

We have been working on our Pearl St. guest suite remodel for the past few months and are so relieved to finally be finished! We had lots of delays on this project – not so much because of the project itself, but because we had other projects going on that took priority. Ultimately, the delays were a good thing because it allowed us the time to think through important details that we wouldn’t otherwise have executed (you’ll see). We’re calling this space the Tiny Suite because, well, it’s tiny. Our plan is to list it on Airbnb when the rest of our home is finished. We’ve been renting out other homes for the last 3.5 years and have really enjoyed the host-guest concept more than the landlord-tenant concept.
If you aren’t familiar with our Pearl St. property, here’s a recap:
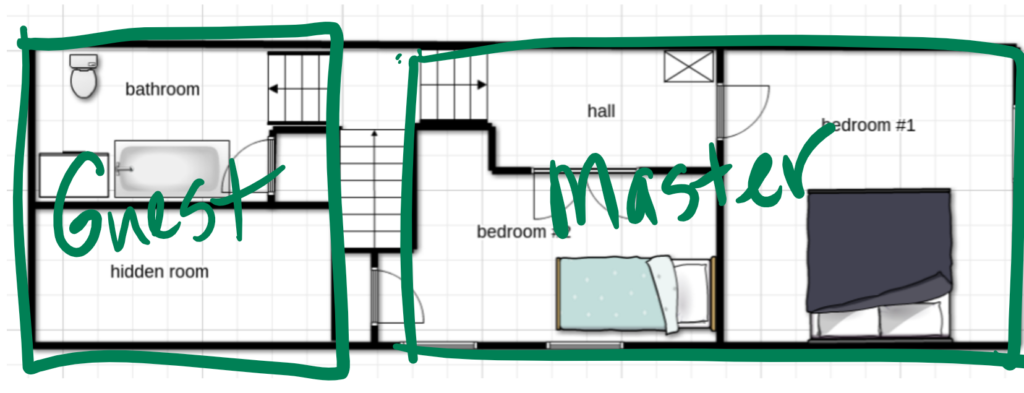
This was the old layout of the 2nd floor of the house. This Y staircase divided the bedrooms from the only bathroom. Quirky.

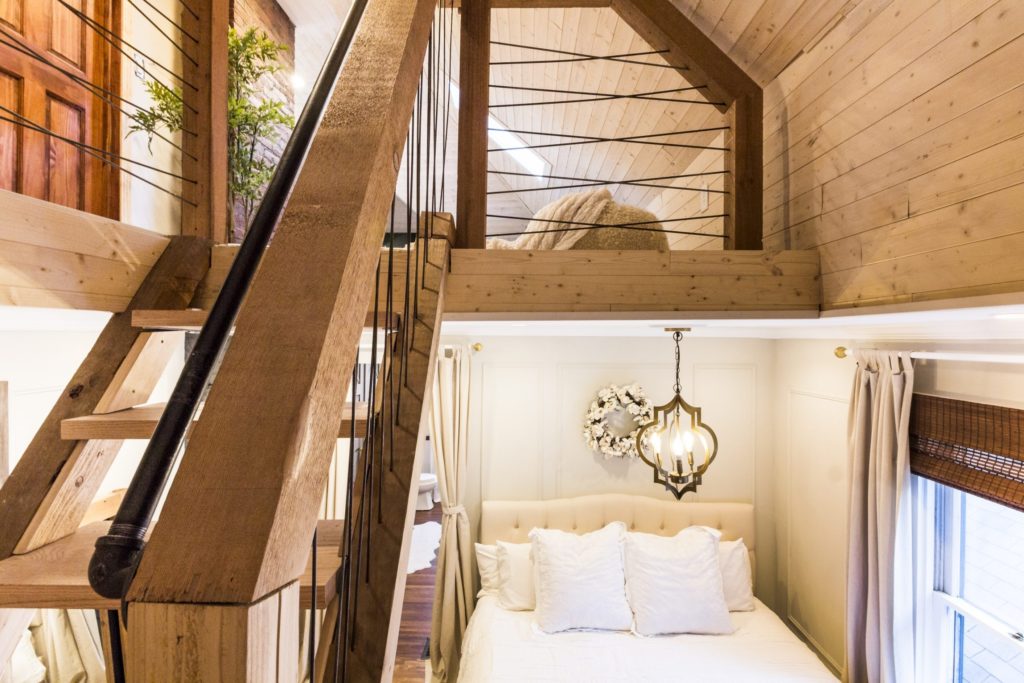
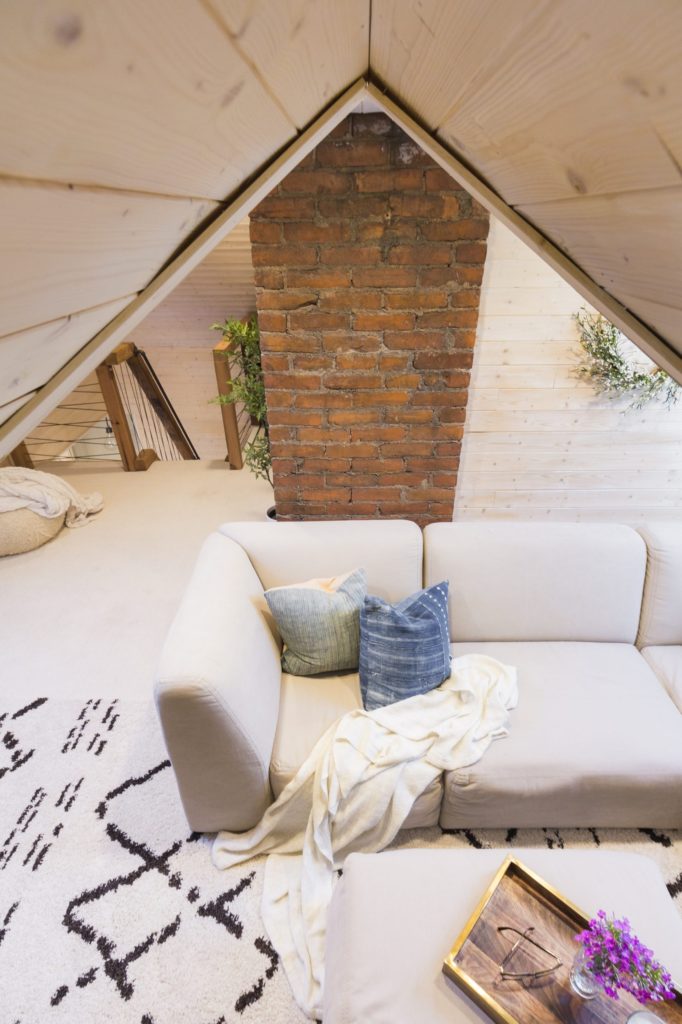
Last year, we converted the entire right side of the stairs into a large master suite w/a 3rd floor loft. You may have seen our posts about this under #thepearlstproject on Instagram, and on the blog here. Here’s a few photos that our friends at UA Creative Studios shot of the new space last summer.
 House Beautiful featured the reno last year, and their tag line was this: “It’s a renovation choice that would make most homeowners nervous,” referring to the fact that we converted one of the two bedrooms into a master bathroom. Little did they know, we had somethin up our sleeves to make up for said lost bedroom!
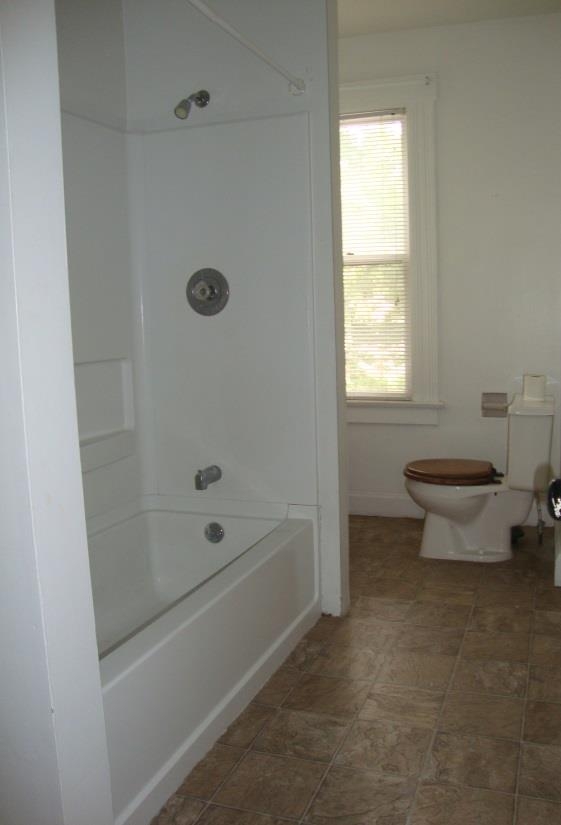
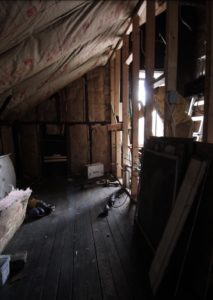
 This was what the old bathroom on the left side of the stairs looked like, pre-guest suite renovations.
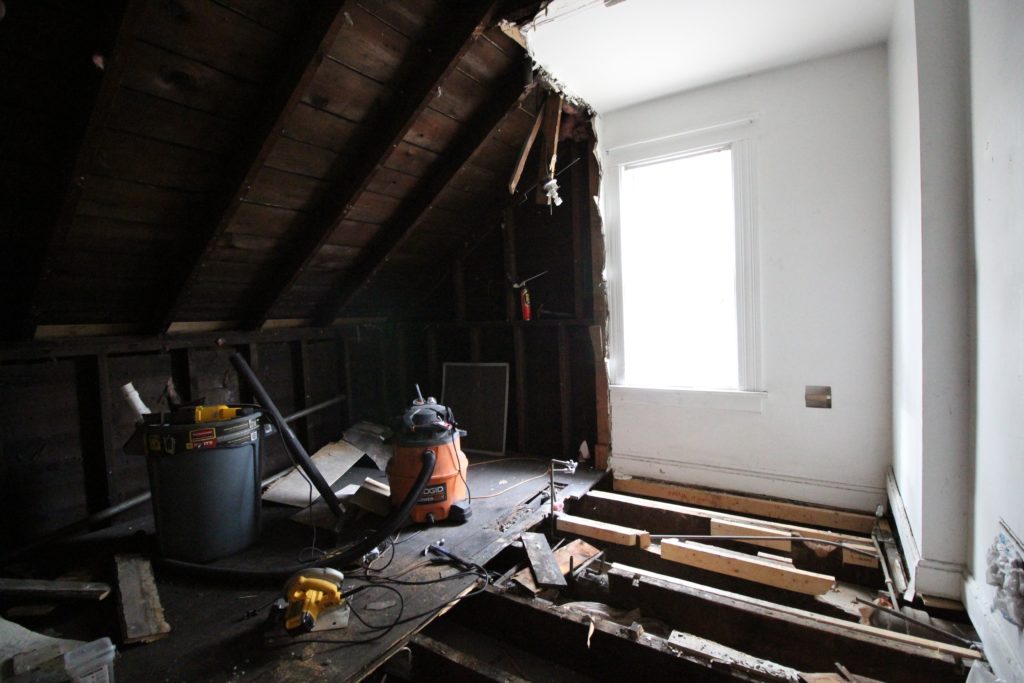
 First, this happened…
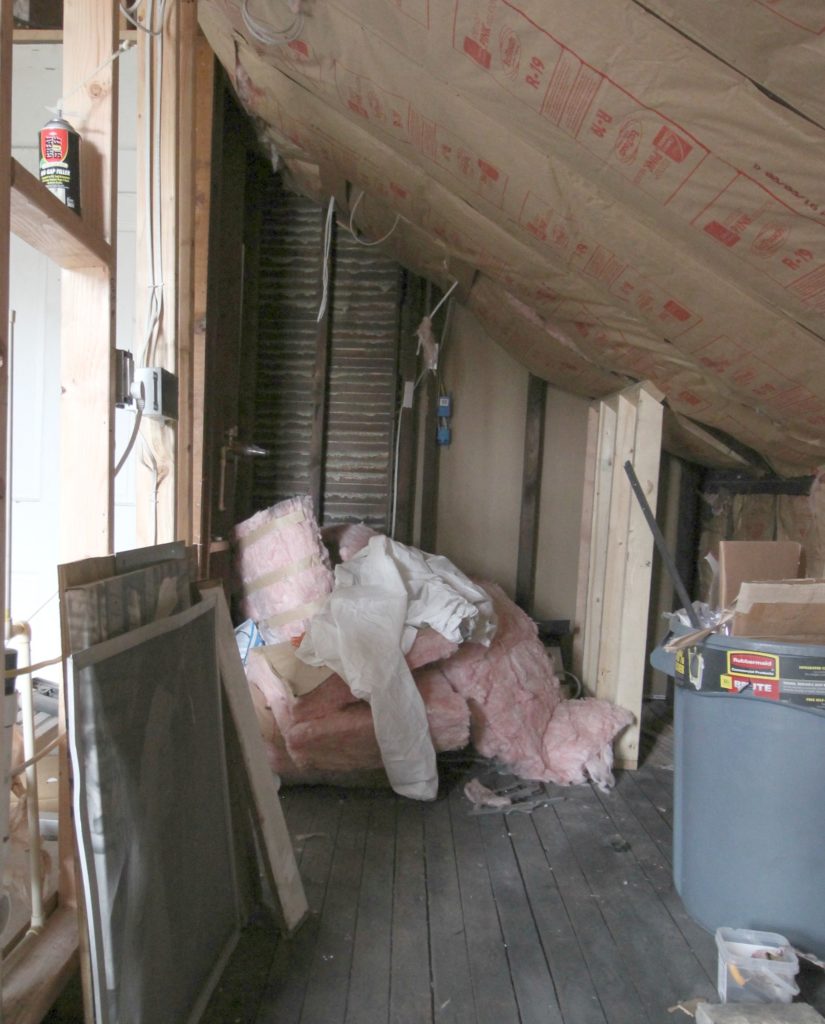
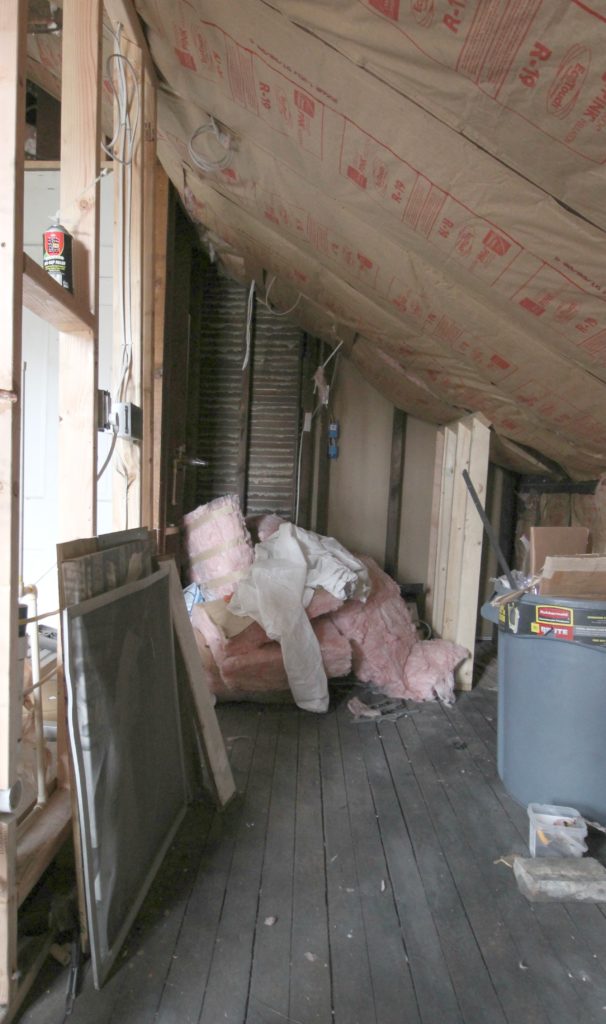
 … which revealed usable dead space that we decided to convert into a bathroom. We snapped this photo somewhere in between insulation and drywall – the shower made for a great storage bin!
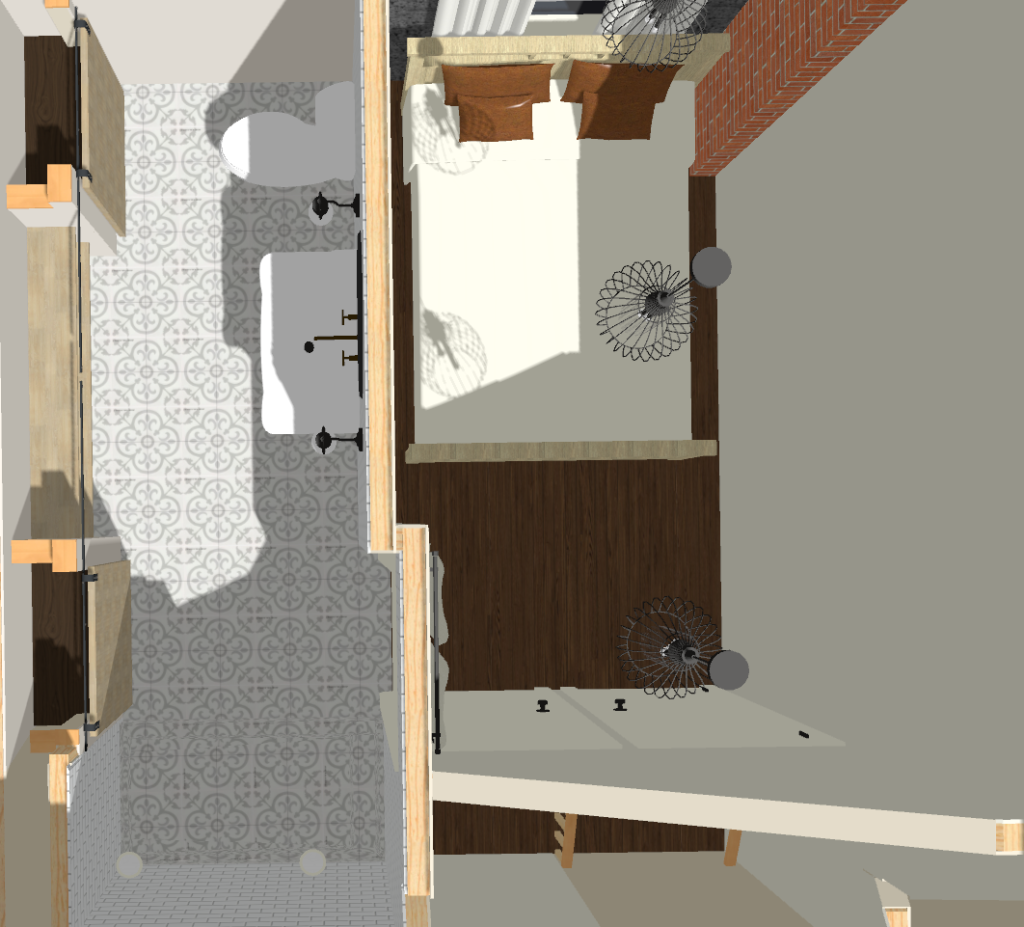
 Being able to convert the unused space into a bathroom allowed us to convert the old bathroom into a small second bedroom. The major benefit of doing this was to get rid of the stair issue – no more climbing up and down stairs to get from a bedroom to a bathroom! We spent lots of time considering different layout options, taking into account plumbing, sloped ceilings, and the fact that a bedroom needs to have a window and closet in it to be considered a bedroom. We mocked up our plans (you can see more in our progress post here)…
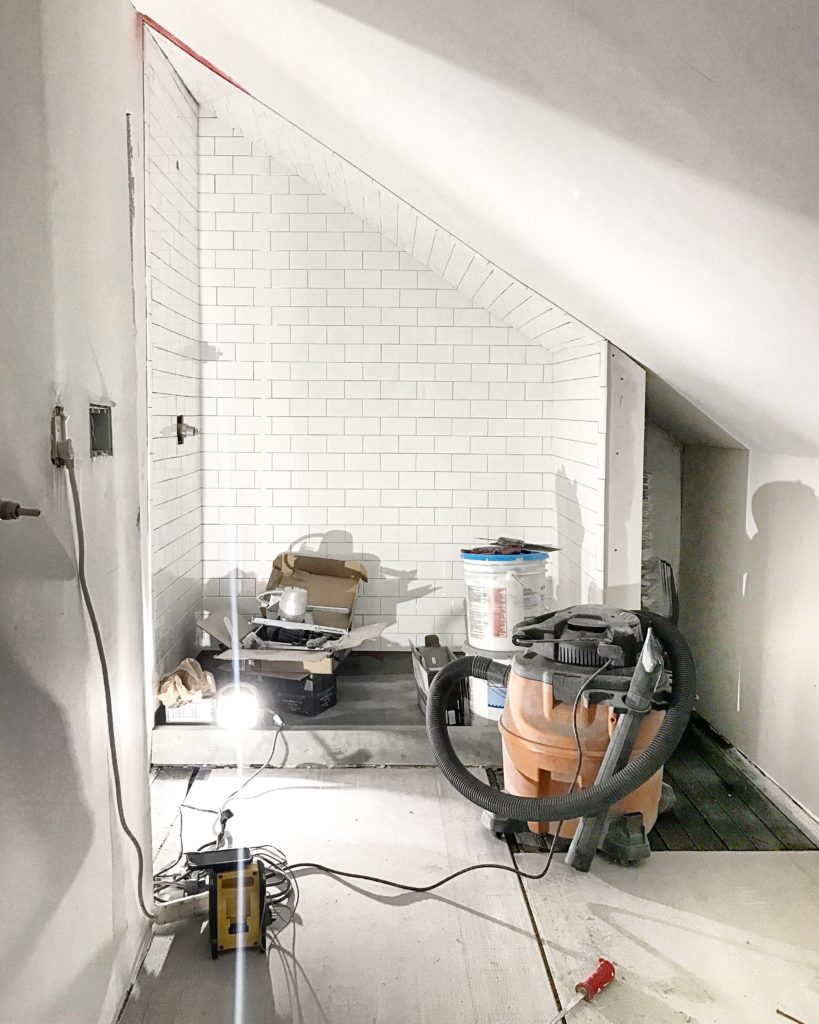
 … and executed!
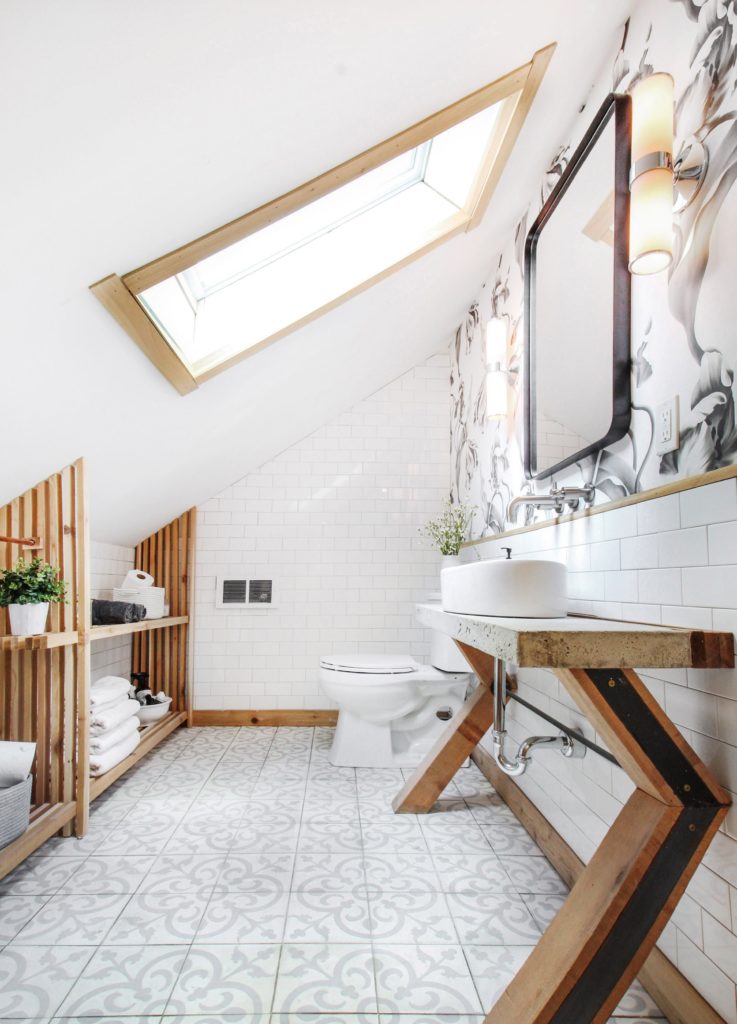
 We collaborated with Riad Tile on our AMAZING floor tile. We found Riad through Instagram and were thrilled to learn that their cement tile is $9/sq ft, compared to $15-20 that we had been seeing everywhere else. They were so easy to work with and really helpful, which made our first experience using cement tile a pleasant one. If you’re in the market for cement tile, or want to learn more about it, check them out!!
 For the most part, install was similar to other tiles we’ve used, but there are 2 important things to know. First, unsealed cement tile is really, really porous, which means that it’ll absorb everything and anything before it’s sealed. When installing, try to keep tiles clean as you go, avoid letting anything sit on them for too long, and seal when you’re done installing (before grouting). Second, use lighter grout on lighter tiles. We used dark grout, which was difficult to wipe up off of the light tile. If you check Riad’s website, they actually suggest using lighter grout on lighter tiles because of this very reason. We lightly sanded + buffed all of the tiles to remove the residue, and everything came up easily! We cleaned all of the tiles really well before re-sealing (we used Miracle 511 Porous Plus Sealer), and were so, so happy with how they came out. The floor totally transforms the room, doesn’t it?
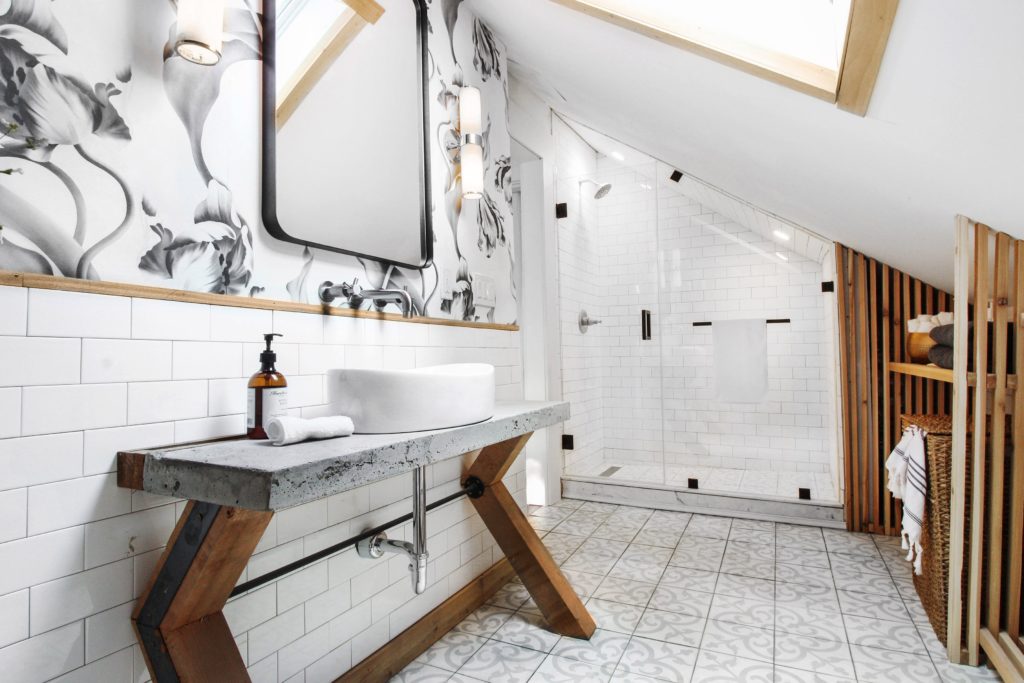
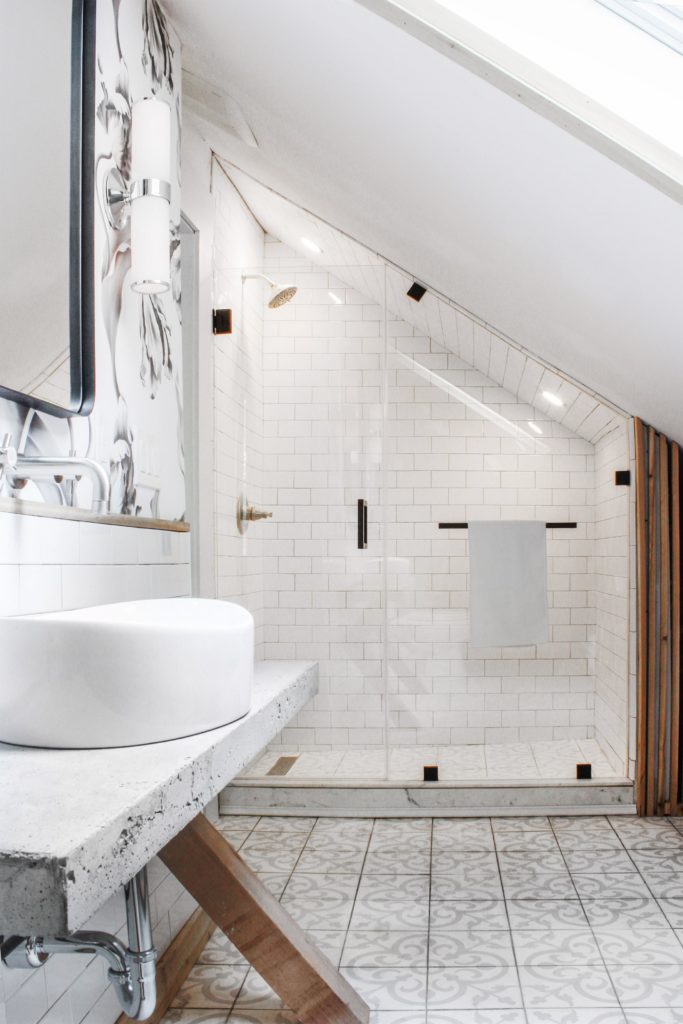
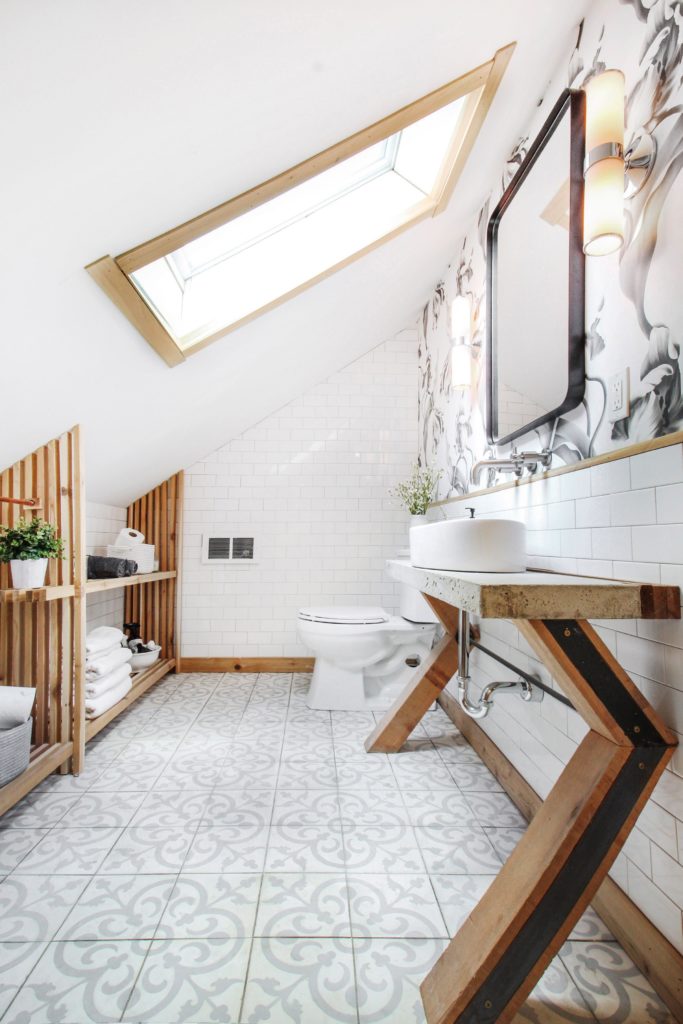
Here’s what the old dead space looks like now.
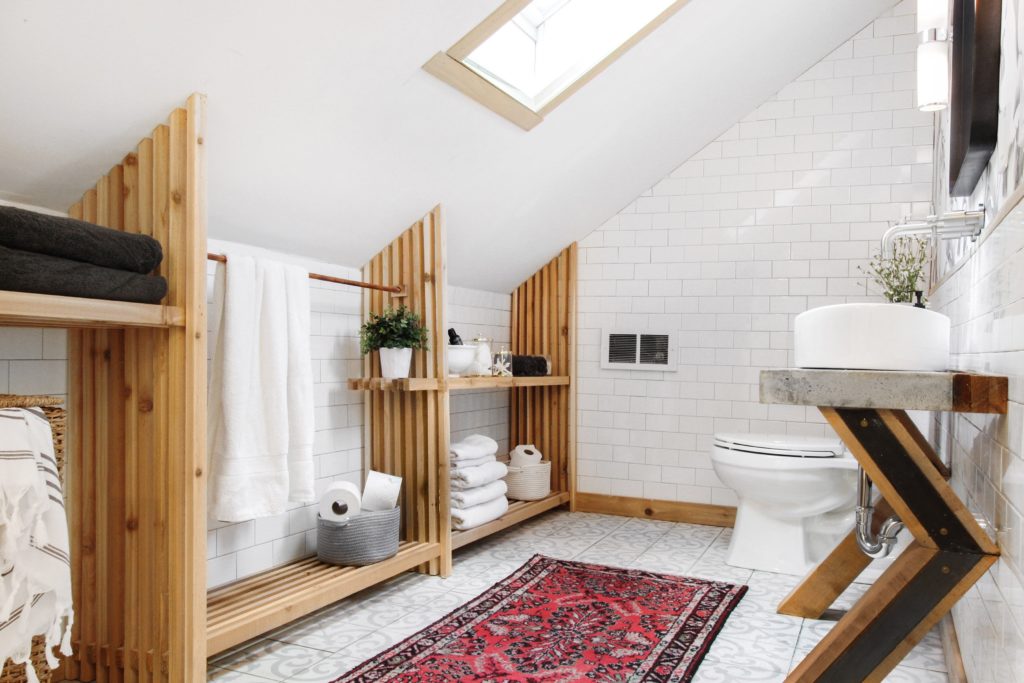 In addition to the cement tile we used from Riad, we incorporated vinyl wallpaper from Ellie Cashman, cedar accents, and a mix of silver + black metals. We had a rug from Dolores Wares leftover from our Chesterfield flip kitchen that we decided to test in here, too.
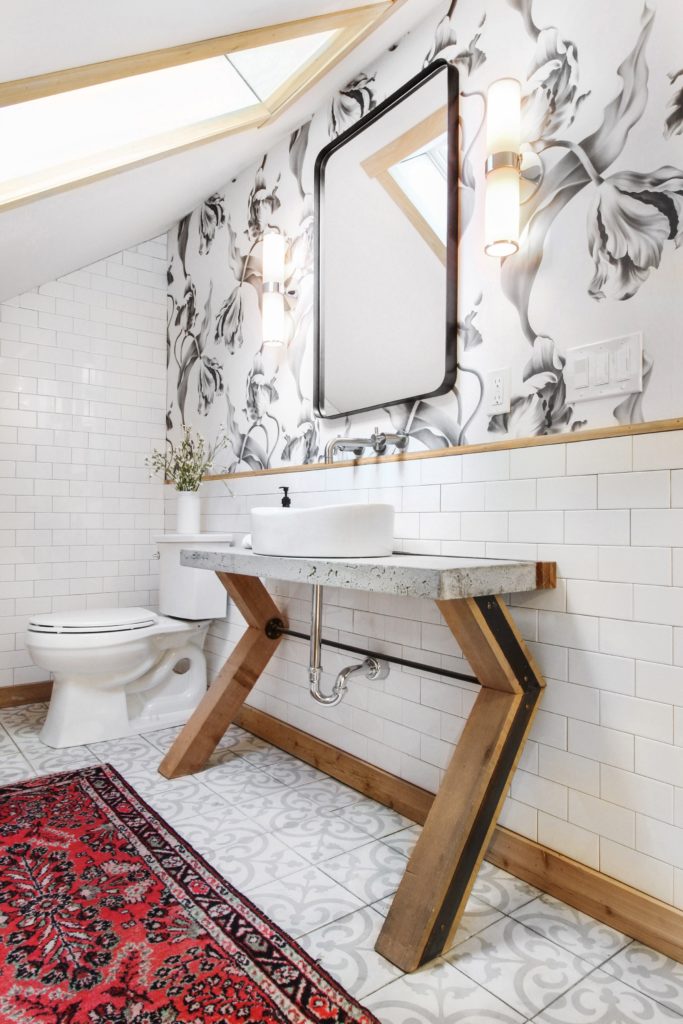 Because of the sloped ceiling, we needed a vanity that was really narrow. Bryan designed and built one out of cedar 4x4s, steel, and concrete, which he made using Quikrete countertop mix. The cedar and steel elements tie in with the loft staircase in the master bedroom.
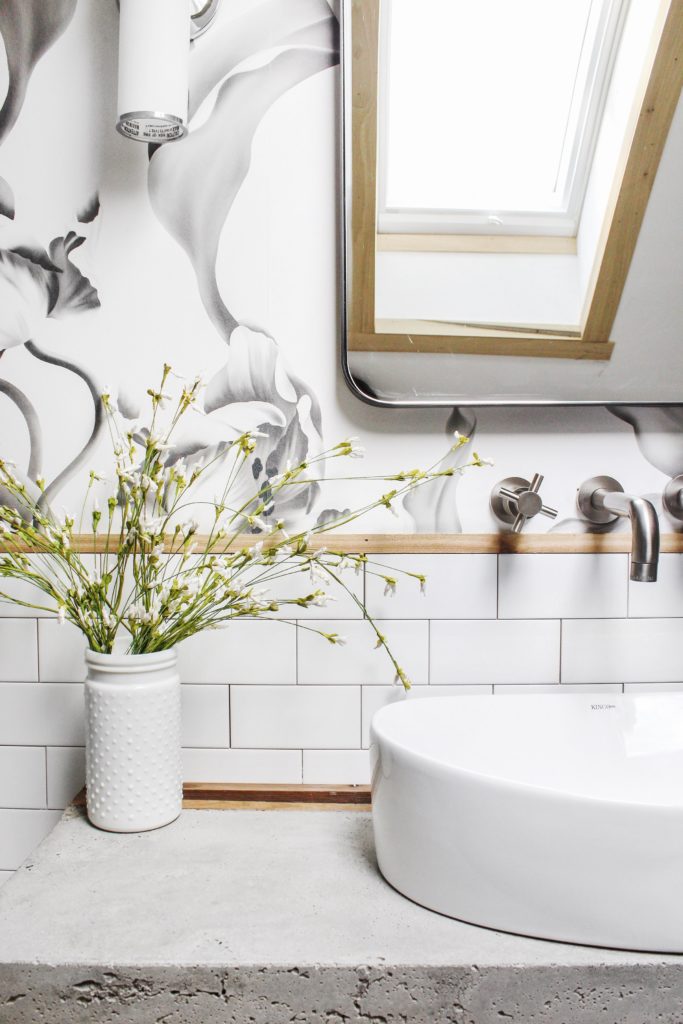
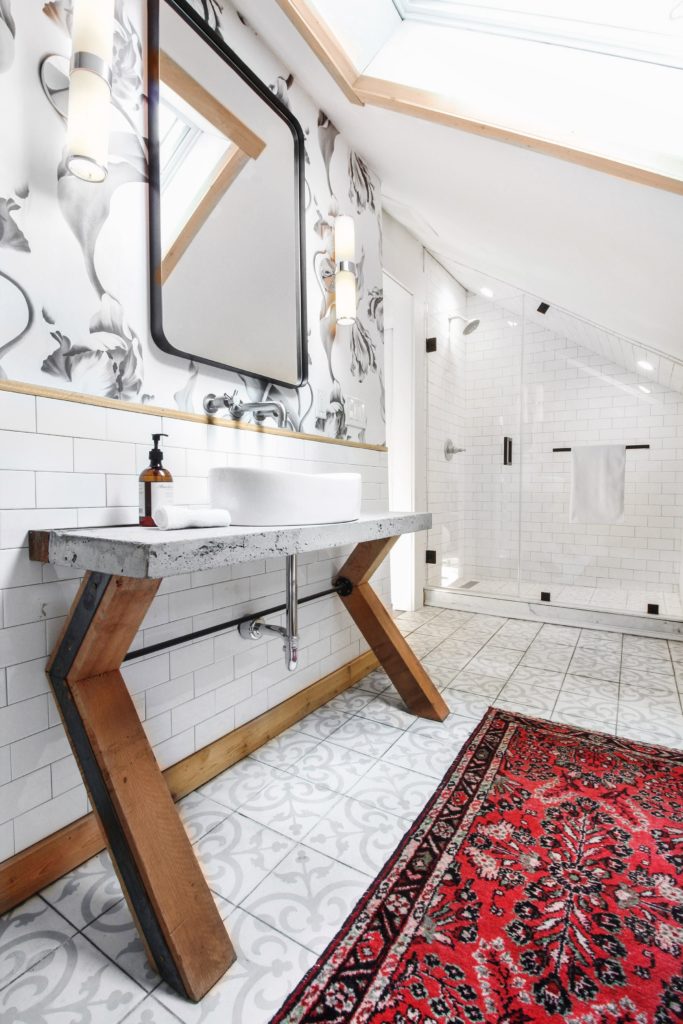 We added a skylight above the vanity for 2 reasons: natural light and ceiling height. Having the skylight in the space adds at least 10″ of height and it makes all the difference!
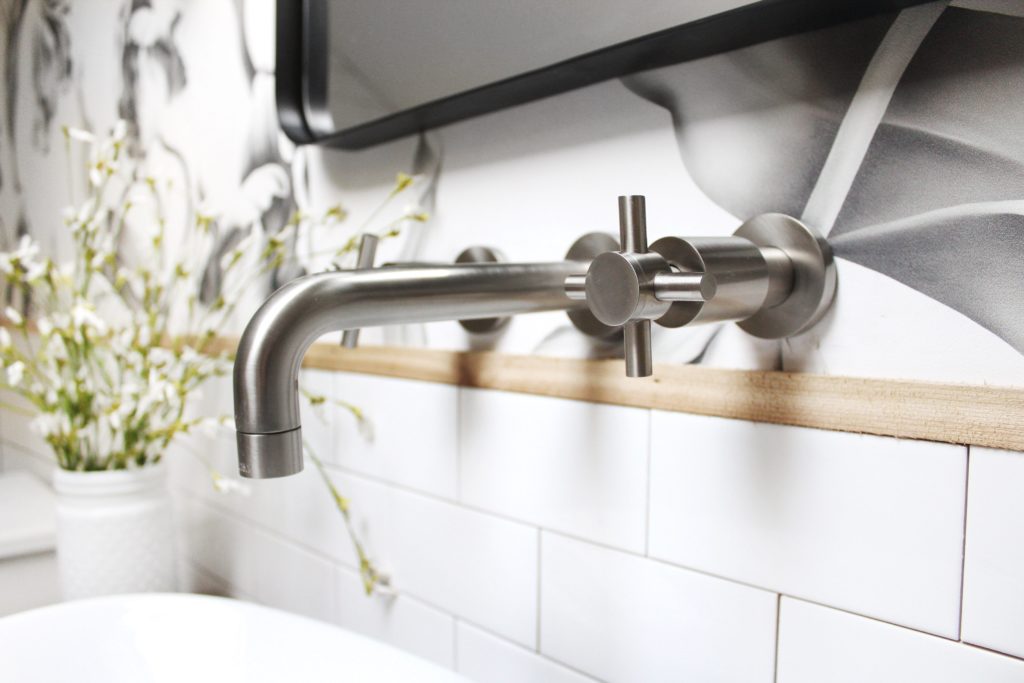
We mounted a vessel sink on the concrete surface, and chose a satin nickel wall mounted faucet to save space. We purchased both from Amazon.
 We found the mirror and sconces on sale at Restoration Hardware outlet.
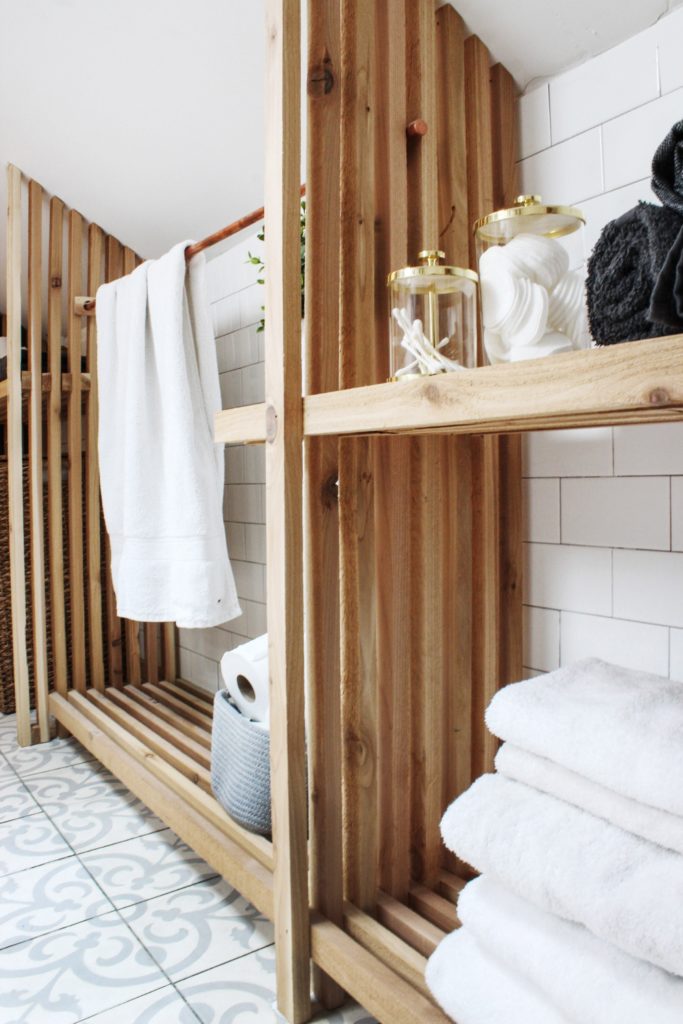
 We had lots of knee wall storage options to consider… closed vs open, built-in vs not, etc. We ultimately opted for open storage because we plan to use this as a guest suite, and having open storage means that people who aren’t familiar with the space can easily find what they need. It was also much less expensive and time consuming than doing custom built-ins. We made the shelves entirely out of 1×2 cedar slats from Home Depot, and incorporated a copper pipe towel bar into the slats. It seemed like a perfect spot for one.
 The shower door was made by Eco Glass – they have been our go-to glass company these days. They came out and measured the space, and then custom made an enclosure to fit the slope. We chose matte black hardware that tied in with the mirror, and had another towel bar added to the glass. We’ll be adding a shelf or a bench inside the shower soon for storage.
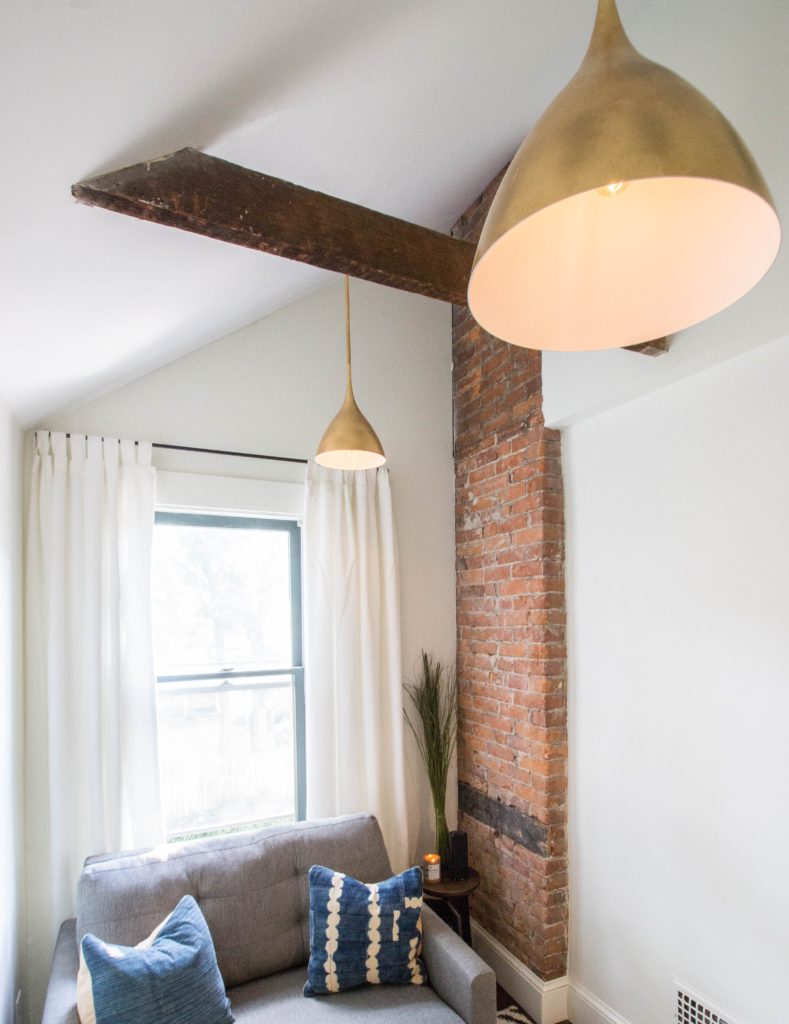
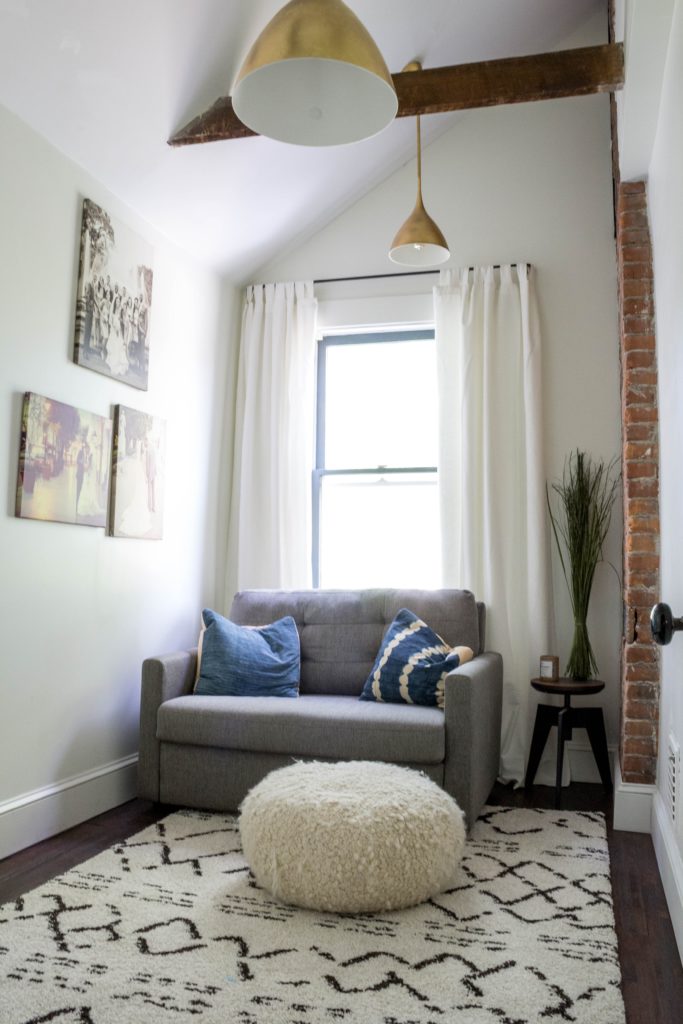
 Onto the old bathroom, which is now converted into a guest bedroom! We hung some of our wedding photos on the left wall for now, but plan to add more art to create a fun gallery wall before guests arrive.
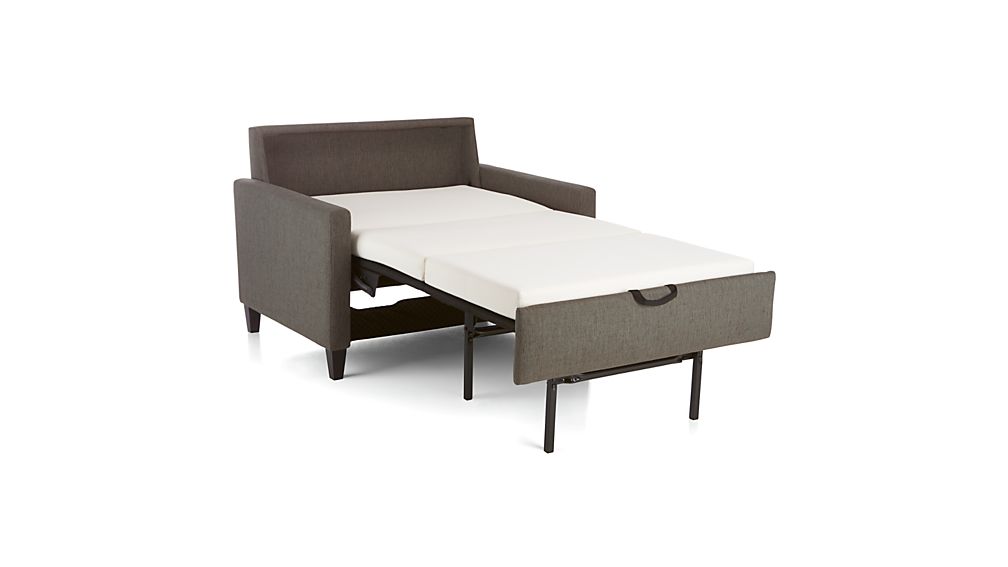
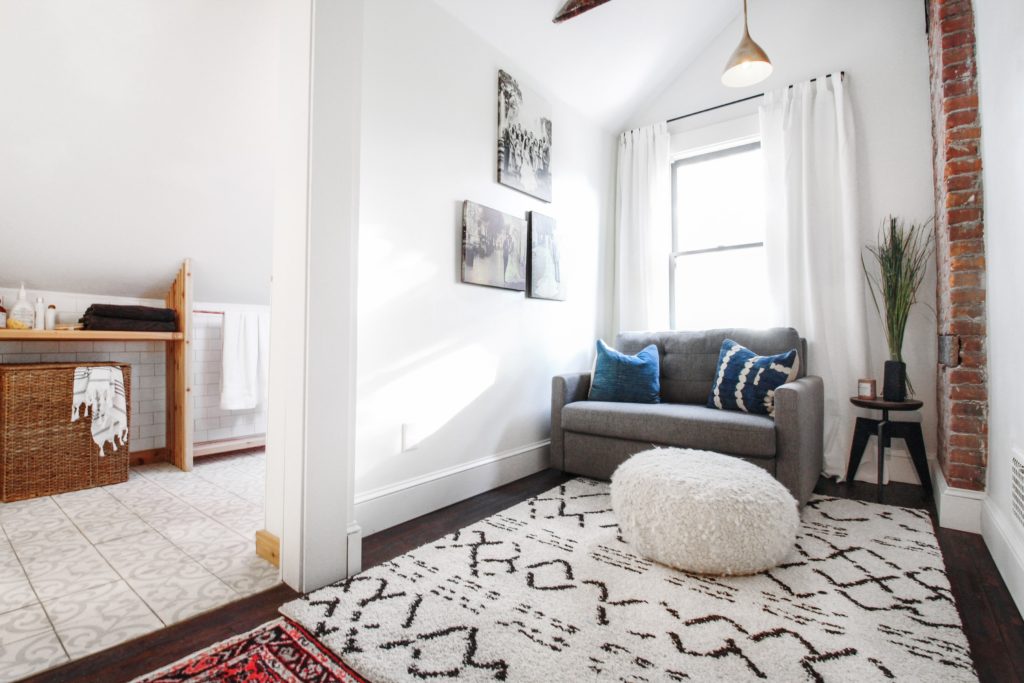 Currently, the room is storing some furniture that we used in prior flips (recognize that rug?), as well as a Crate & Barrel Karnes Twin Sleeper Sofa that we found at the outlet for $450 a year ago (reg. $2,899!). The memory foam mattress is a really comfortable alternative to spring mattresses that pull outs tend to have (several family members have tested it) and the couch is also comfortable to sit on when it’s folded up. We’ll have to see how a single bed does in there for now – we may want to swap it out for a double or a Queen so we can accommodate 2 people. We shall see.
 Here’s one more look at before & after:
We’ll be back soon w/more updates! Until next time…


Stunning, absolutely stunning. Everything is gorgeous – from the tile to the concrete sink stand with the cedar braces, to the shower….wow!
Thank you so much Karen!
AMAZING!!!
Thanks JoAnna! Really appreciate the love!
Everything looks great but I’m a sucker for ingenious use of space. That shelving unit adds so much storage and looks amazing! Great job!
Thanks Steph! It was fun to build ????
Absolutely STUNNING and that vanity is so cool!! Bryan did a great job on that! I wouldn’t change anything – I love it all including the wallpaper!!! Thanks for sharing!
Thanks Yvonne!
Amazing job! I am so envious of what you have been able to do. We also have slanted walls, (A-Frame with slanted walls going all the way to the floor), so I am always interested in how creative people deal with these.
Thanks Jill! It’s always a fun challenge working with sloped ceilings!
Wow! This project is amazing. I love the way the bathroom turned out and love the mix of funky materials and patterns! I am a designer myself and am very tempted to feature this on my blog soon if that is okay!
Thanks for the inspiration.
Thanks Shelby! Of course – we’re flattered!
So beautiful! I would love to recreate your vanity in our brewery that we are opening. Any ideas for where I could find similar plans?
Thanks Andrea! No plans that we know of :/
This is really incredible! My sister introduced me to your site through this bathroom design and now I’m hooked on your work. We’re (someday) thinking about turning our attic into a master bedroom and this design made me realize that we may actually be able to add a bathroom as well! There are definitely other considerations (like where do we put the stairs), but your creativity gets me dreaming. What are the dimensions? I’d specifically love to know the height and get a sense of how an adult fits in there. You two are ingenious with this. That is all!
Thanks Elizabeth! The bathroom is about 6×12. The tallest part of the ceiling is around 8.5’ and the lowest is 4’. Bryan is 6’4” and loves the shower. The skylight over the vanity helps a lot w/extra headroom (we plan on adding another above the toilet, too).
Awesome, thank you! That sounds great. Makes me so hopeful we can have a bathroom whenever we decide to remodel our attic.
[…] a neat idea for a vanity in a bathroom with odd ceiling […]
What an amazing use of space! Can you share what material you used on the slanted ceiling in the shower? Thanks!
thank you! subway tile.
Spectacular Reno! I’m hoping to do a similar project. What are the dimensions of the bathroom space?
Thank you! About 14’x 6′.
Hello, I am new to your work and you are so talented! Cannot wait to see what the future posts are! Thanks from Nashville.
Thank you for your comment, Michele! So glad you’re here.
[…] and have been slowly renovating it over time. You have probably seen photos of our master suite, our little guest suite, and our One Room Challenge this past spring where we finished our living & dining rooms. […]