• Home
  • About
  • Stay With Us
  • Our Design Studio
  • Gift Guides
  • Nav Social Menu

    • Facebook
    • Instagram
    • Pinterest
  • Bathroom
  • Kitchen
  • Decor
  • Our Homes
    • The Blonde Vic
    • Pearl St.
    • Historic Townhome
    • First Home Tour
  • Press
  • Contact

Beginning in the Middle

Shut the Front Door

DIY

4 Sep

Psst!  Our front door makeover was featured on Oprah.com!  Check it out here.

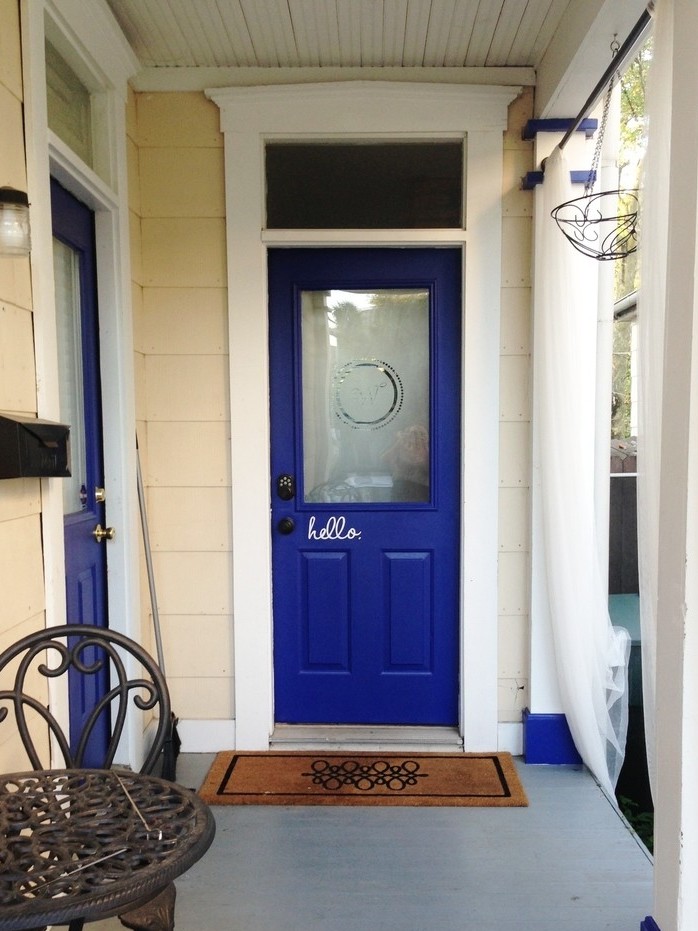
Revamping our front doors was one of my favorite projects at our first home (yes, we have two front doors – we haven’t figured out why, but most of the old houses in the area have them!)

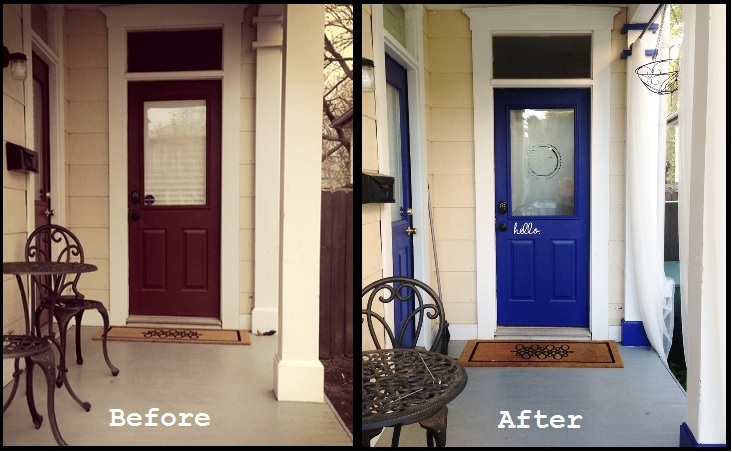
Here’s what we were working with when we moved in:

IMG_1064

As you can see, there wasn’t anything particularly wrong with them. We just thought they could be pepped up a bit, especially since a lot of the other homes in our ‘hood are colorful.  There’s a few others that have red doors, so we figured we’d be bold and try something different.  Here’s what we did.

1 – Painted the outside doors and details of the porch posts “Classic Royal Blue” (4009-8) by Valspar.

2 – Painted the inside of one of the doors for an added pop of color inside.

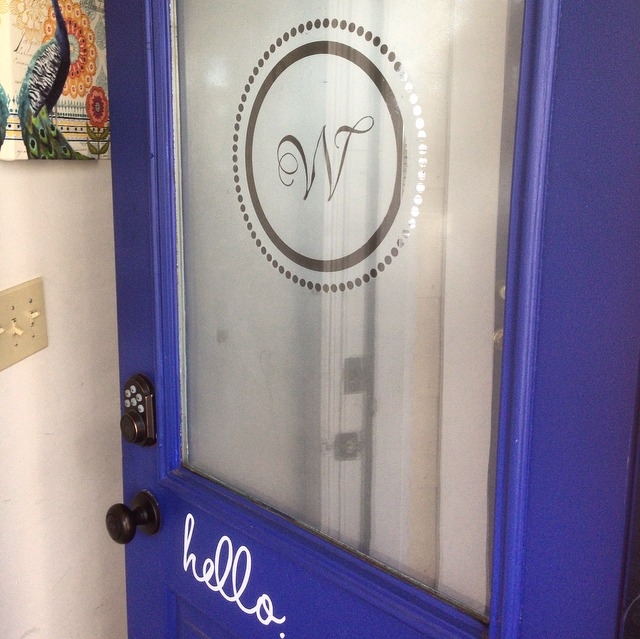
3 – Purchased a “hello” decal from this Etsy shop.

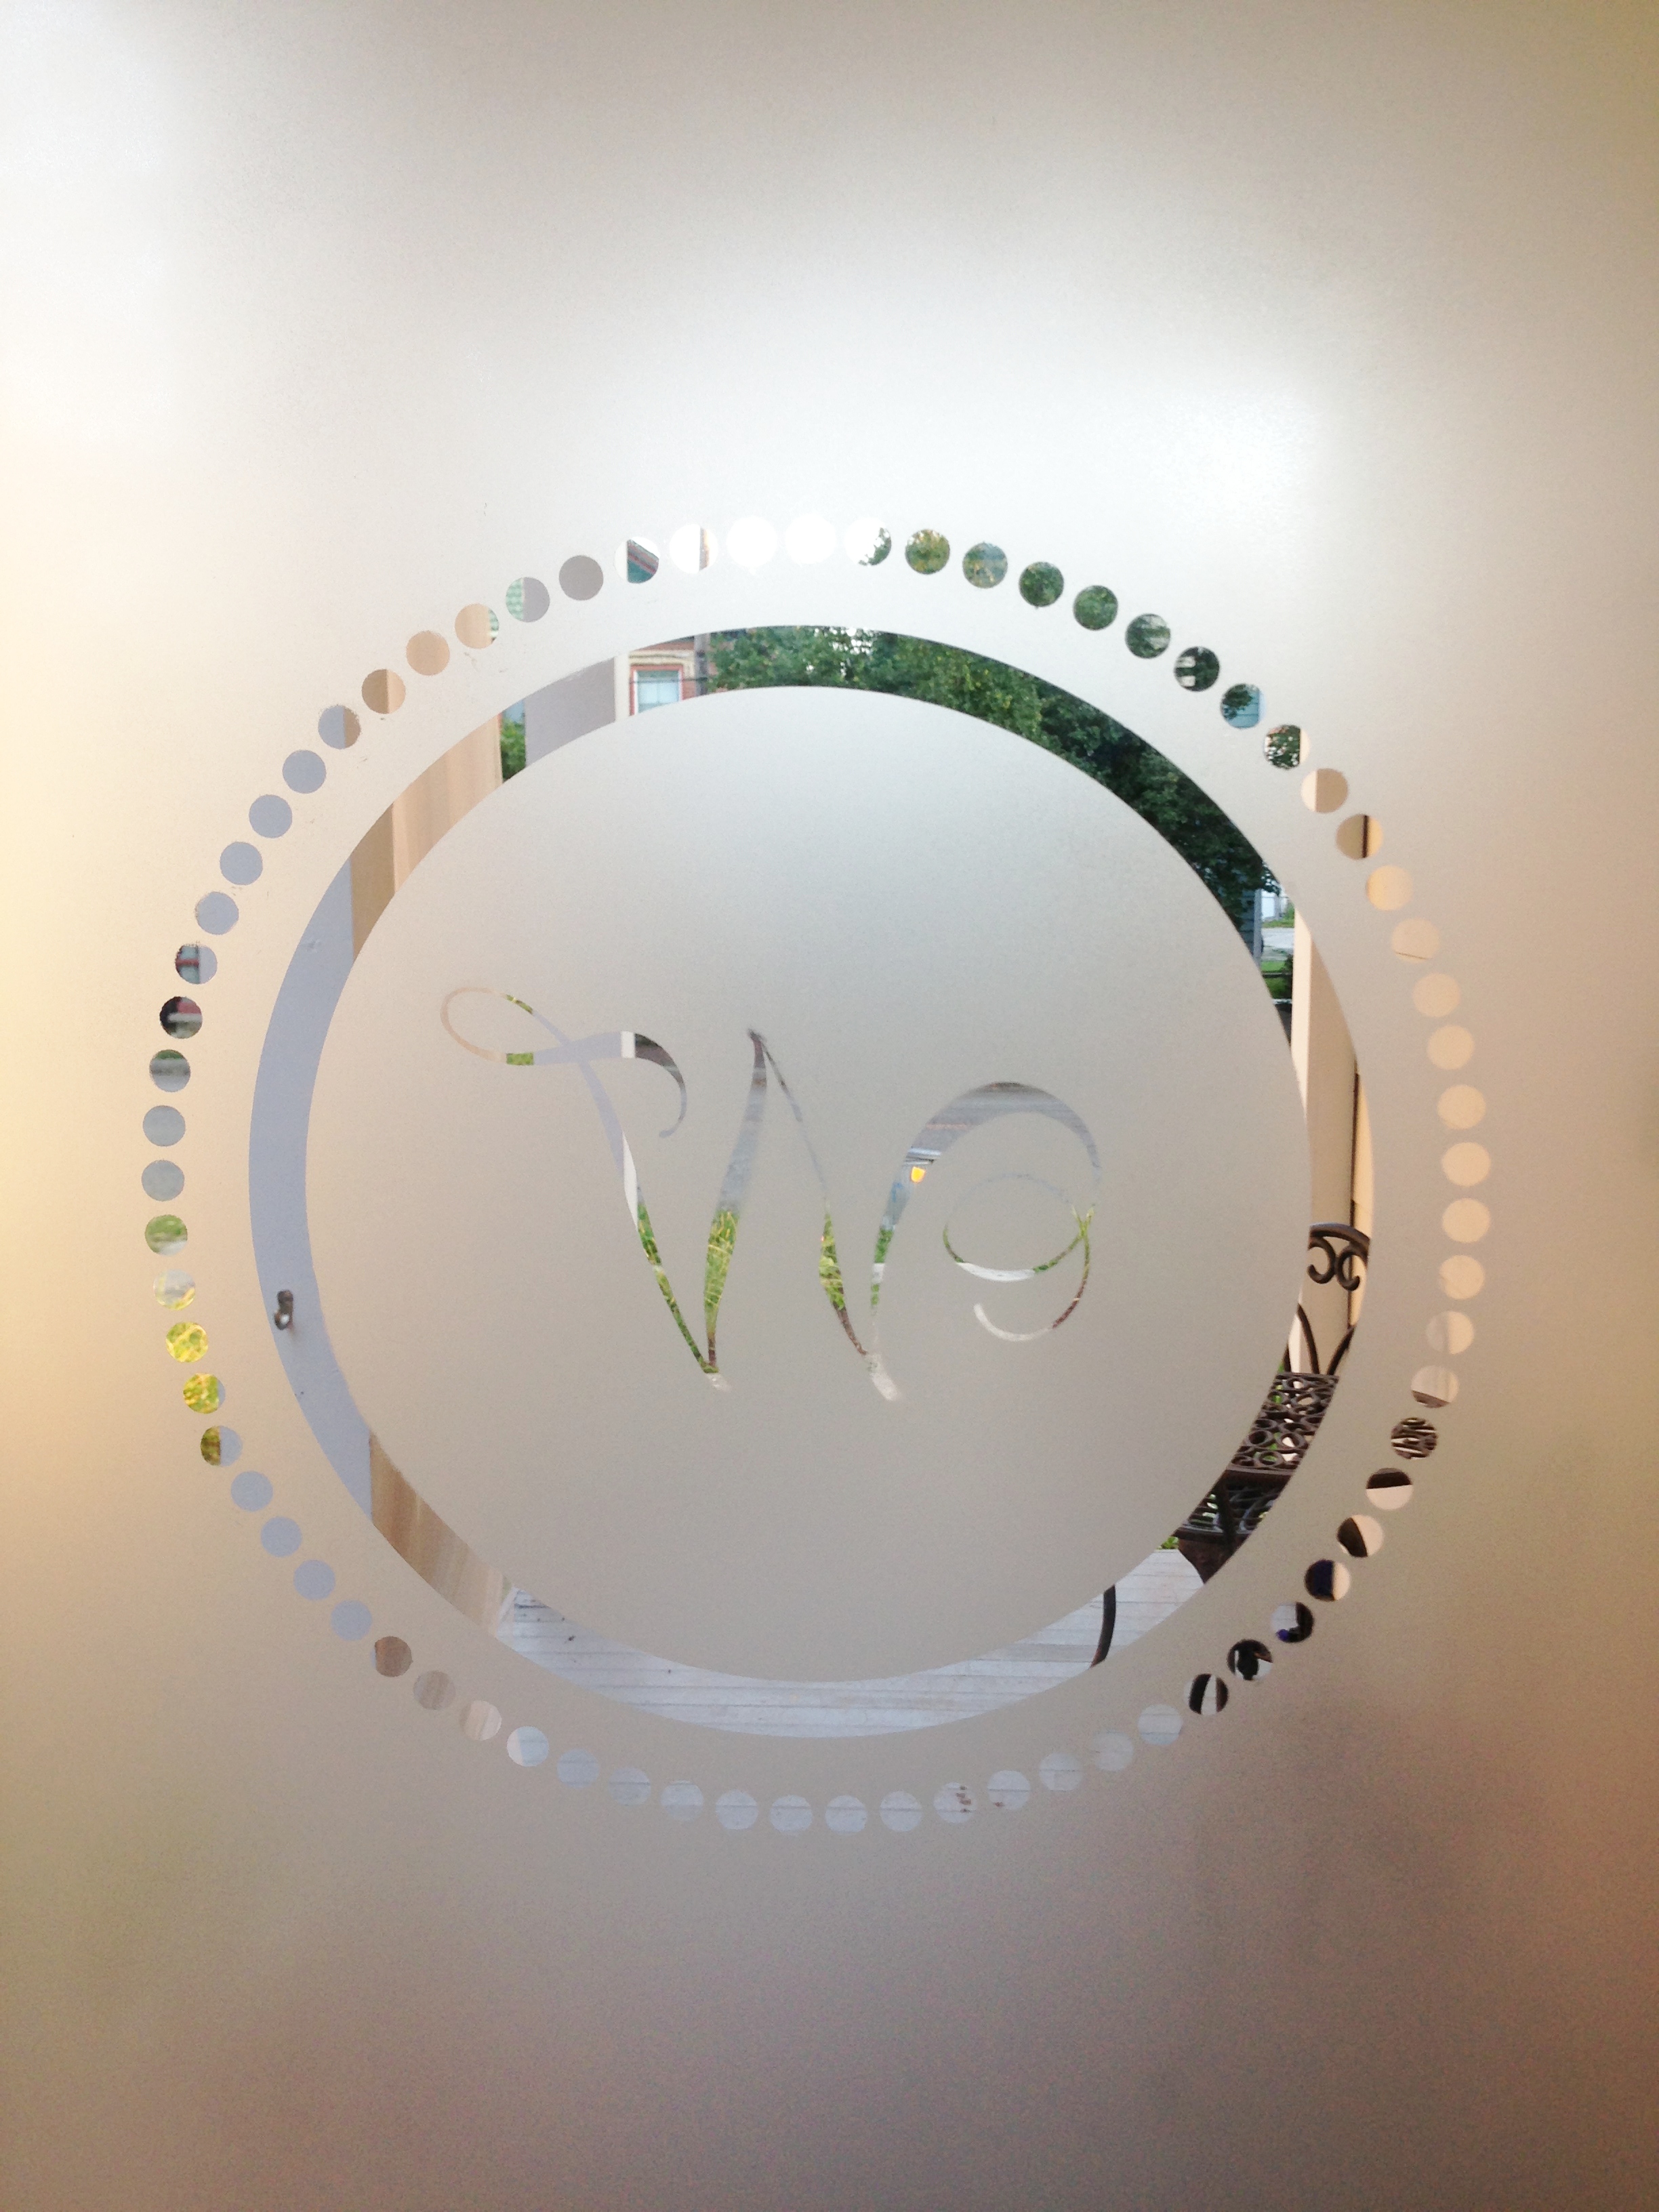
4 – Purchased a “W” Monogram from Dali Decals (we customized it to be reversed, so it would show correctly through the window from the inside, and 12″ diameter instead of the standard 22″ so it would fit)

5 – After applying the decal to the inside, we used Rust-Oleum Glass Frosting Spray to frost over the decal and rest of the window.

6 – That didn’t work. The spray came out blotchy on the window and we had to scrape it all off (Let me just tell you, removing this stuff was NOT fun!)

7 – Repeated #5 & #6 three times (I was hopeful it would get better, okay?)

8 – Purchased Valspar Glass Frosting Spray and tried one last time. BIG SUCCESS!

9 – Applied 3-4 “wet coats” (5-10 min between each coat) until the glass was fully frosted and evenly covered.  Then we let the whole thing dry for about an hour.

10 – Carefully peeled off the W decal, including all of those tiny little circles around the edge (it was worth it!)

Here’s how it turned out… drum roll please…
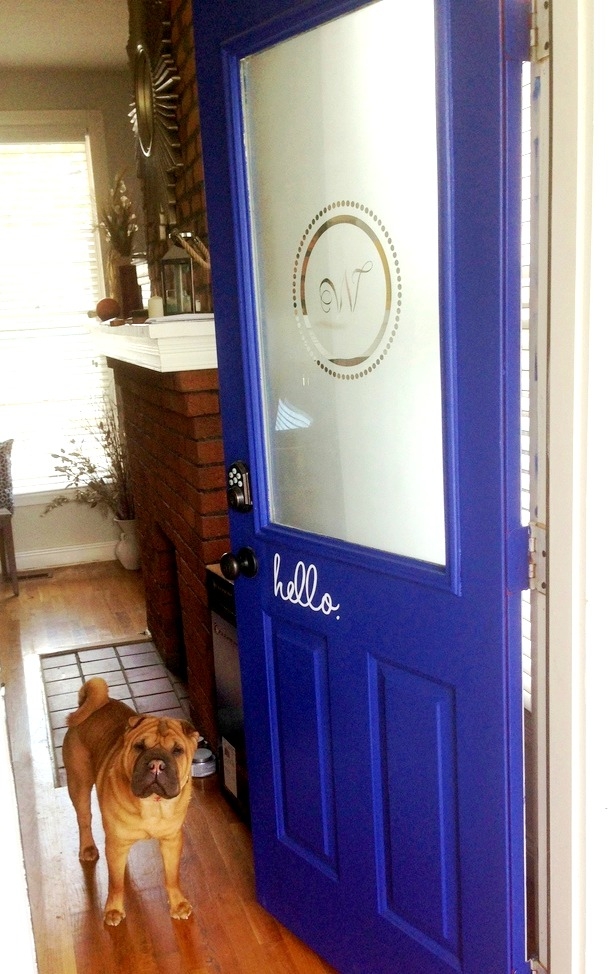
door-final-2

unnamed

door final 1

Inside looking out:

IMG_1952

door 5

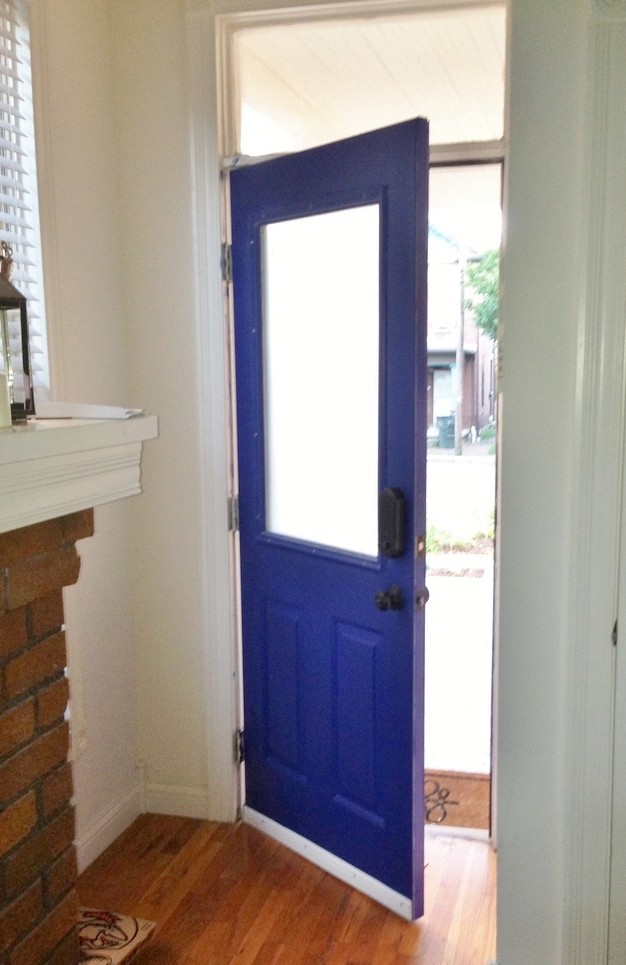
Originally I was a little nervous about how it would look in all of the seasons. Because this color is so bold and bright, it makes me think spring/summer instead of fall/winter.  But we quickly discovered it actually complemented the oranges and beiges and yellows and greens really well (see more on our fall décor post here).

Porch 2

We feel like we’ve given it new life, and the fun part is that it’s different from any other door we’ve seen.  So yay for that.

Cost Breakdown:

1 qt. of Valspar Duramax Paint in “Classic Royal Blue” (covered 3-4 coats of paint on 3 doors, plus the trim on the posts of the porch) – $17
High Density Foam roller – Free (had it)
“Hello” Decal – $9
Valspar Glass Frosting Spray – $5
12″ W Decal + shipping – $18
Total Cost: $49

Front Door Before & After2

Update: Unfortunately our pup, Baci, passed away in August 2014.  Wasn’t he just the cutest dog?  We were so heartbroken, but are thankful for the times we had with him.

Want to see more?  Follow us on Instagram @beginninginthemiddle!

16 Comments

Previous Post: « Back Yard Makeover
Next Post: Curb Appeal – Part 1 »

Reader Interactions

Comments

  1. jacq says

    September 5, 2013 at 11:51 am

    amazingness….i’m obsessed now,

    Reply
  2. beginninginthemiddle says

    September 5, 2013 at 1:08 pm

    Thanks Jacq!!

    Reply
  3. Candi says

    September 5, 2013 at 1:34 pm

    I love your front door! Thank you for using my decal!! Do you mind if I use the pictures for my shop?
    Candi
    Welcoming Walls

    Reply
    • beginninginthemiddle says

      September 5, 2013 at 2:40 pm

      Thanks Candi! It worked perfectly for our project. Feel free to use the photos for your shop 🙂

      Reply
  4. Dominique Paolini says

    September 27, 2013 at 12:25 pm

    What a huge difference. I love the details.

    Reply
    • beginninginthemiddle says

      October 2, 2013 at 7:41 am

      Thanks Dominique!

      Reply
  5. atkokosplace says

    October 23, 2013 at 6:01 pm

    Fun color! It’s so awesome to see people not afraid to use color.

    Reply
  6. Christina says

    November 3, 2013 at 7:35 am

    It’s adorable now! Love all the details. And that’s a great tip about using Valspar instead of Rustoleum. How was it spray painting inside? We have a window we would like to frost, but I didn’t want to frost everything else in the room too. 🙂

    Reply
    • beginninginthemiddleblog says

      November 4, 2013 at 9:39 am

      Thanks so much Christina! Our door was in a corner near another large window so we were ok in terms of messiness and ventilation. I would definitely recommend bringing the window outside if possible (spray vertically or else the spray will drip on your surface and mess it up!). If not, open all of your windows and cover everything nearby with a drop cloth. The spray does tend to spread to unwanted places (it kind of looks like a layer of dust) and can get smelly.

      I think there’s frosted glass films available that might work for your purposes, too. They might be a bit more than $5 but they would be less messy!

      Reply
  7. Julie Shearer says

    September 12, 2014 at 7:06 pm

    Wow!!! It looks Wonderful! Thanks for sharing.

    Reply
    • Catherine says

      September 12, 2014 at 7:30 pm

      Thank you Julie!

      Reply
  8. Kalani says

    June 9, 2015 at 3:19 pm

    Hello… I found your blog through an Oprah.com piece on front door ideas.
    We have nearly identical fireplaces!
    I’ll be poking around!

    Reply
    • Catherine says

      June 9, 2015 at 4:54 pm

      Awesome! Thanks for stopping by 🙂

      Reply
  9. Lindsey says

    July 27, 2018 at 10:54 am

    Amazing idea!!! Thanks so much for sharing!!!

    Reply

Trackbacks

  1. It’s Fall Y’all | Beginning in the Middle says:
    October 4, 2014 at 9:27 pm

    […] room, which completed the rustic/natural look we were going for.  I was scared that our new blue door might not look with fall décor, but I’m digging […]

    Reply
  2. A Kitchen in the Making | Beginning in the Middle says:
    December 2, 2014 at 2:23 pm

    […] our powder room door, which we have big plans for.  Hint: it’ll be something similar to our front door makeover at our first […]

    Reply

Leave a Reply Cancel reply

Your email address will not be published. Required fields are marked *

This site uses Akismet to reduce spam. Learn how your comment data is processed.

Primary Sidebar

Currently Loving

Faux Plants

Lighting Picks

Rug Picks

Let’s Connect

  • Facebook
  • Instagram
  • Pinterest

Browse by Category

Deep in design mode these next few weeks as we not Deep in design mode these next few weeks as we not-so-patiently wait to close on our next project (!!!) It’ll be a mix of all of the things we’ve been doing for the last 7 yrs, but also something we’ve never done before. ☺️ Any guesses??

#theblondevic
Design + reno: @beginninginthemiddle 
📸 @alliepal
Those in between spaces need love too 🖤 #theblo Those in between spaces need love too 🖤 #theblondevic #beforeandafter 

Thanks for perfectly capturing this for us @alliepal 🤗
Same view, 4 years later ♥️ #theblondevic #bef Same view, 4 years later ♥️ #theblondevic #beforeandafter 

📸 @linea.photo 
Styling: @ma2thewjg 
For @hgtvmagazine
Just a family, posing for a photo, trying to stay Just a family, posing for a photo, trying to stay still and smile all at once ☺️ Thank you for your shares and likes and kind words on our magazine feature this week. Feelin the love and so grateful for your support! 📸 @linea.photo for @hgtvmagazine
Late afternoon light brings out all the pretty gre Late afternoon light brings out all the pretty green in our kitchen 🖤 We DIYd the reeded detail on the island with thin wood dowels and a pin nailer! #theblondevic 

📸 @linea.photo, styling by @ma2thewjg for @hgtvmagazine 

Cabinet color: Behr Black Sable
Surprise! We have a spread in the March issue of H Surprise! We have a spread in the March issue of HGTV magazine and our living room MADE THE COVER 🎉 @ma2thewjg and the styling team worked their magic to bring springy vibes & lots of fun color into #theblondevic, and @linea.photo captured everything beautifully. So thankful we could bring this home back to life, and excited we can share it with all of you! #hgtvmagazine #victorian
We swapped another switch in our house to a @lutro We swapped another switch in our house to a @lutronelectronics Caséta Smart Dimmer Switch, which allows us to control our lights remotely from the Lutron app, set lighting schedules, and create “scenes” that automatically adjust multiple lights in a room — no matter if we’re home or not. Our parlor chandelier dims down to 15% around sunset every evening (we also have our kitchen pendants set to turn on at 6am so we never have to walk into a dark kitchen in the morning!). The added control and convenience over our lighting is so nice, and being able to schedule them to come on/off throughout the day gives us extra security when we’re not home! #turnonpeaceofmind #sponsored
All new, but make it look old ☺️ #whitecapecot All new, but make it look old ☺️ #whitecapecottage #beforeandafter

Copyright © 2021 · Refined theme by Restored 316